Getting started with sourdough
This article was originally published in October 2019
Interested in baking with sourdough? The first step is creating your starter, a fermented mixture of flour and water. This recipe is slightly condensed from Cynthia Lair’s new book, “Sourdough on the Rise,” reprinted with permission from Sasquatch Books. See our article “Life in your loaf” for Lair’s story on sourdough’s many benefits.
Equipment
1 wide-mouth, one-pint jar with a metal band and lid
8-by-8-inch square of cheesecloth
1 wide-mouth, one-pint jar with a metal hinge and rubber gasket (optional)
Piece of masking tape and pen (optional)
NOTE: Make sure that your jar is clean, though not recently washed with detergent or bleach (both kill microorganisms).
Ingredients
1.25 ounces (¼ cup) unbleached white flour
1.25 ounces (¼ cup) whole grain flour
(wheat, rye or a combination)
½ cup lukewarm water
½ small plum or 1 grape with bloom (the chalky white film on the skin, which contains natural yeasts)
Another 1 to 2 cups of both flours for feeding
NOTE: Organic flour and unchlorinated or filtered water are preferred. Both chlorine and pesticides have the capability of killing microorganisms.
DAY 1
Combine both flours and water in the jar. Stir the mixture vigorously. The consistency should be similar to pancake batter. Adjust either water or flour if it isn’t.
Drop the plum or grape into the flour and water mixture and leave it there. The bloom on the fruit will attract the wild yeast living in your home.
Cover the jar opening with cheesecloth. If it is late summer and fruit flies are around, use a piece of muslin or a dish towel, which have a tighter weave. The cloth will keep dust and flies out but allow wild yeast in. Secure the cloth with the metal band part of the jar lid. Screw it on over the cloth. Set the lid aside.
This is important: Seek out a warm place in your home, an area that stays at 70 to 80 degrees F, to let the starter brew. In the summertime, this could simply be your kitchen counter. In the winter, maybe on top of your refrigerator, or in an insulated lunch tote with a warm dish towel. Without the warmth, it will not grow. Pay attention to what the jar is sitting on. A cold granite counter will not keep it warm, so you may need to set the jar on a thick piece of cloth.
DAY 2
Stir, but don’t feed.
By skipping a day of feeding, you allow the budding population of bacteria and yeast to proliferate without having to digest a new feeding. Remove the cloth and vigorously stir, several times, while giving positive feedback: “Looking good!”
DAY 3
Stir and feed.
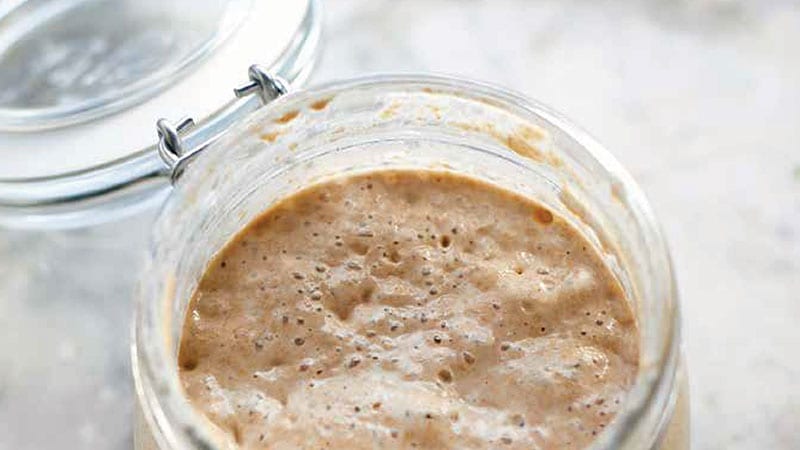
Stir first. Are there tiny bubbles on the surface? Oh, glee! Does the starter feel lighter or a little frothy when you stir it? This tells you that the microbes are active. If the mixture seems active, remove the fruit. Then add 3 to 4 teaspoons of whole grain flour plus an equal amount of lukewarm water and stir vigorously. Keep the starter the consistency of pancake batter. Adjust the flour or water if needed. Replace cheesecloth cover. If you do not find bubbles forming after day 3 or 4, your starter newbie may not be warm enough. Find a warmer location or wrap the jar in a wool sweater or scarf. Wait another day or two before feeding, keeping the starter warm.
DAYS 4 THROUGH 7
Feed and stir each day.
When you check the starter each day, before feeding, notice if the starter is “eating and eliminating.” Elimination will appear as a thin layer of clear liquid on the top of the batter. This liquid, and subsequent bubbles when stirred, are indications that the bacteria and yeast have moved in. The liquid can be stirred back into the mixture—it’s what gives the starter its sour flavor. If the starter is getting too sour for you, the liquid can be poured off. Some people refer to the elimination liquid as “hooch.”
To feed, add 3 to 4 teaspoons of whole grain or white flour (or a combination) plus an equal amount of lukewarm water and stir vigorously. Replace cheesecloth cover.
If during days 4 through 7 you begin to build over 1 cup of starter, rather than continuing to create more starter volume, discard about one-third of the starter before feeding it as described above. Discarding some of the starter will actually make it stronger, as you are thinning out the bacterial population. If you continue to build up the volume, there may be too much food and not enough bacterial growth to consume the food. The starter may suddenly seem less active. Like when you serve a large turkey and there are only two people at the table to eat it. They may try to eat it all but will likely feel overfull and lethargic.
Keeping a separate jar of flour near the starter for daily feeding is handy.
DAYS 8 THROUGH 14
Feed and stir every other day.
Skip the feeding on day 8 and begin again on day 9. Feed the same amount of flour and water as described in days 4 though 7. Also, follow the same instructions for discarding one-third of a starter that is getting large. Continue keeping the starter at 70 to 80 degrees F. Begin tasting the starter before you feed it, checking for sourness. After 14 days, the starter should be mature and ready to use in baking.
DAY 14
Ready to bake!
Once the environment of wild yeast and bacteria in your starter is established, meaning each time you feed it there is visible activity (bubbles) and the taste is sour, you’re ready to bake.
If you are not planning to bake right away, the starter can be moved to the refrigerator. Consider moving your starter to a jar with a metal hinged lid and a vulcanized rubber gasket. The gasket acts as an airlock, allowing CO2 to be released at a certain pressure but not allowing oxygen to come in. This is exactly what you want if you are an occasional baker and need to refrigerate the starter between bakes.
If your plan is to begin baking every day, you may want to transfer the mix to a one-quart wide-mouth jar so you can build up the volume you will need for frequent baking.
Consider naming your starter to ensure that your connection goes beyond just you and a jar of flour and water. When I teach sourdough starter classes, I suggest that students name the starter after someone they know and love or some name/word that has meaning for them. Starters with names may be less likely to suffer from neglect.
2-DAY SOURDOUGH WORKSHOP
Join Lisa Crawford, our resident member of The Bread Bakers Guild of America, for a two-day intensive course covering all things scratch-made sourdough. Dig into terminology and techniques, learn the basic formula and stretch your imagination by experimenting with different types of flour. Walk away with a sourdough starter and the know-how to bake your own loaves at home.
Learn more and sign up at pccmarkets.com/classes.